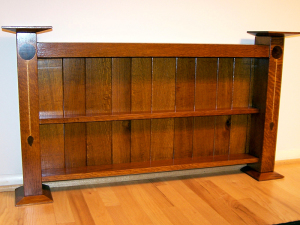
I think working with hand tools can be a great place and a terrible place to start.
To walk this fine line and land on the happy side of it, one needs to be VERY specific about what they are building and have a clear plan in mind before you pick up a tool or cut any wood.
The Bad Side of Hand Tools
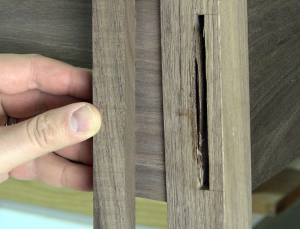
Let’s look at the bad first. Hand tools are ambiguous at best. They require a lot more sense memory to use and precision is a very relative term and sometimes an unnecessary element to consider.
Hand tools beget hand tools. While at face value one may think a smaller tool kit is needed you can very quickly amass a collection of “gotta have” tools just to complete a simple project. Yet without some time in the trenches planing and sawing the new woodworker can quickly get frustrated when his or her tools don’t function like the ones that guy on the Internet uses. (another reason to turn it off for now)
The frustration starts an ugly spiral that can lead to buyers remorse at best and total abandonment of the craft at worst. I firmly believe that hand tool work doesn’t have to be hard and it is shocking how quickly a new skill can be learned.
But there is always a learning curve and the anxious beginner can sometimes forget this and become disillusioned when their first or second attempt is a failure. On the converse, the power tool user can and should expect perfectly straight and square cuts from their machines on a first try and 300th try.
The human machine variable is often overlooked and we expect our shiny new (and expensive) tools will compensate for this variable. Not true. A finely tuned back saw will make things easier but fundamental sawing skills are still needed.
To succeed, the beginner must be realistic about their limitations but also should be quick to step away from practice and into applied work. Practice cuts are too abstract and the woodworker isn’t as invested in the outcome.
The Good Side of Hand Tools
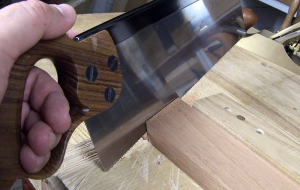
Here is the flip side of this equation.
A hand saw can cut any compound angle you can think of and a plane has an infinitely variable feed rate and limitless board capacity. Gaining comfort with the basics of plane, saw, and chisel use means that you can build anything without the need for additional tools.
Don’t get me wrong, additional tools will help you speed things up but everything boils down to these basic 3 tools. This means that you need a much smaller space to work and therefore much less start up time and money to get started. More will come and don’t believe anyone who tells you that a smaller tool kit can be had going the hand tool route.
Eventually you will add more stuff and inevitably you will spend a lot of money regardless of whether you go the new tool or vintage tool route. But this should happen over time as the project demands it. This organic growth of the tool kit means you will have a stronger appreciation for the tool and why you would use it over one of the fundamental tools. You will also not experience the frustration that comes from buyers remorse.
Finally what I feel is most important is that learning these fundamental skills will without question make you a better woodworker. You can ALWAYS fall back on the fundamental skills when another hand tool or a machine lets you down. You will never have to say, “if only I had [insert tool here] I could build”.
Basic hand tools are infinitely adjustable and can replace ANY tool’s function
But they require skill to use them. This skill is the product of experience but I think you will be surprised how quickly that can be gained in the process of a single project build.
3 Considerations For Choosing Your Project
The specifics project you choose will go a long way to ensuring your success but more importantly you desire to return to woodworking and challenge yourself with another project. This goes doubly when talking about using hand tools to build this first project. There are a few things you should consider in choosing this project.
Make It Small But Not Too Small
Building a box will keep the stock costs down and the whole thing feels more approachable. But with small size comes higher scrutiny and you will find there is much less room for forgiveness in sloppy joinery. I actually think boxes are some of the more complex projects for this reason.
Plus there is something to be learned from fitting together larger pieces and ensuring they stay square or match up to flanking joints. So think about bedside table sized projects. They keep the investment in materials and time down but also teach you something about making furniture sized parts and joining them together that would be lost on really small projects.
Choose Single Joint
It is actually rare that furniture have a whole bunch of different joinery in it. Let’s face it there really aren’t that many types of joints that you need. But just focus on one. If you build a table, its nothing but mortise and tenon work.
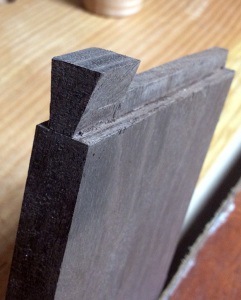
If you build a cabinet, its four corners of hand tools. You could choose to add a drawer to the table to get in dovetails or add a door to the cabinet to do bridle or tenon joints but then you spread your focus and increase the number of variables that could lead to your frustration. There is always the next project to add these other details and skills.
Looking at it another way, when you build a piece of furniture using a single joinery type then there is a good chance you will have to make a lot of that joint. A bedside table for instance will have 8 mortise and tenons.
Use A "Real" Wood
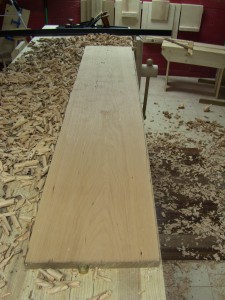
I like Pine as much as anybody. It’s honest and humble and makes a statement when furniture is made with it.
But Pine doesn’t accurately represent what its like to work with hardwoods which is what most woodworkers will end up with eventually. Secondly, unless you are buying Pine from a specialty dealer (which don’t exist much anymore due to the razor thin and small profits on Pine) you won’t find very nice material when you compare it against what is available in hardwoods.
Pine is primarily milled for construction lumber and grade isn’t much of a concern in this market. Therefore the Pine forests are managed for this type of production. The material is often rushed through seasoning and will add all kinds of headache to the milling process.
You will be better served to spend a little more and buy a hardwood. Choose something like Cherry or Soft Maple (not its Hard Maple cousin, you’ll thank me later) or Walnut or even Oak. These woods will be harder obviously and they will give you a much better sense of how hand tools work with harder woods.
Suggested First Projects
These above concessions will severely limit what you build in your first trip out but that is the point. At the same time there are infinite variations that can come from this kind of blank slate project that allow for creative license.
If not during this first build, perhaps on the second or third build where you opt to add in some complexity. With these in mind I suggest the following projects.
Side Table
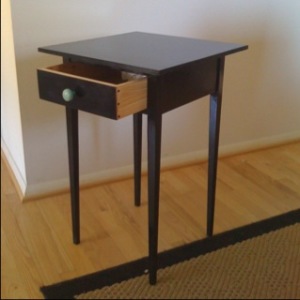
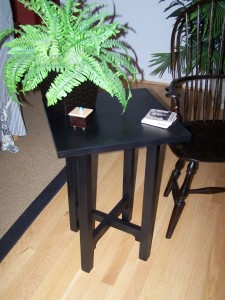
Call it a plant stand or a side table but imagine a cube that is about 24″ high and anywhere from 16×20 to 20×20 in width and length. 4 legs, 4 apron pieces, a 2-3 board top and that’s it.
You can choose to taper the legs for a more delicate look, you can choose to put a bevel on the top edge for the same effect, these elements are up to you but won’t require anything special but a hand plane to execute. 8 mortise and tenons will be all the joinery you need which is more than sufficient to get you cutting this joint really well. The top will teach you how to plane and join boards into a wider panel which is probably one of the most fundamental of processes in furniture making.
BookShelf
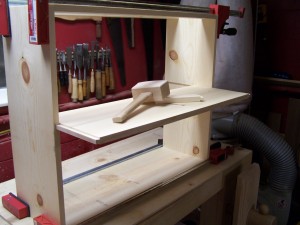
Everybody could use a bookshelf. Focus on one that is 2-3 but no more than 4 shelves. Anything taller and you add in complexity with working with longer stock.
You will get a bunch of experience gluing up panels and I would urge you to buy stock that is specifically narrower than your shelves to get this experience. You can choose to build the entire thing using dados or you could build it all with mortise and tenon joinery.
Fix at least one shelf in the middle and make the rest adjustable or make them all fixed and increase the number of joints you have to cut thereby increasing the learning experience. For a base you can wrap it with a base moulding (moulding doesn’t have to be curvy) or even set it on top of a plinth that is essentially the same table leg and apron discussed in the above project with really short legs.
A bookshelf is really the perfect blank slate project and there are hundreds of directions you could go to embellish it from the basic carcass.
Wall Shelf
This could be as simple as a dovetailed box that hangs on the wall or something that uses through tenons, miters, or even just dados and rabbets.
It will teach you to plane stock flat and square and possibly to glue up panels. It will teach you to make a box that is square and again will allow you to focus on single joint, repeated at least 4 times.
A Stool
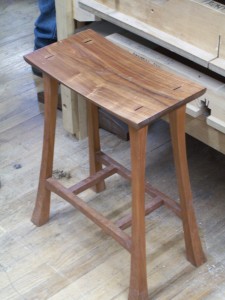
Chairs scare a lot of woodworkers but they don’t have to be complex. A stool can be build with square joinery much like a box but often times these forms require angles off square and usually compound angles.
What you will find with hand tool work is that compound angles cuts are made exactly the same as square cuts. Layout the line and saw or plane to it. A stool can be built using nothing but mortise and tenons, or you could choose to make round tenons with wedges. You will also invariably need to glue up a panel for the seat and therefore get experience with another essential skill. Or consider the iconic Shaker step stool which just comes down to dovetail work and making panels.
If you think hard enough about the “required elements” I list above you could probably come up with another project to attempt too. This is the beauty of woodworking in that we can choose to build whatever we want and customize it however we want. It is this freedom that excites so many of use about this craft and will keep pulling you back in.
 God bless you Ted. You
saved me tons of money. I almost went to bought an overpriced side table until
I saw your plans. Thanks for all the great ideas. It's gonna keep me occupied
for a long time. :)
Andrew Furman
God bless you Ted. You
saved me tons of money. I almost went to bought an overpriced side table until
I saw your plans. Thanks for all the great ideas. It's gonna keep me occupied
for a long time. :)
Andrew Furman Great projects inside with
clear instructions on each. I've gotten an enormous feeling of accomplishment
& pride from making my own bookshelves. Thanks!
Great projects inside with
clear instructions on each. I've gotten an enormous feeling of accomplishment
& pride from making my own bookshelves. Thanks! I downloaded your plans 2
days ago and had to come back just to say that, it's just like what you said.
There is enough variety of projects in here, big and small, intricate and
simple. Cheers!
I downloaded your plans 2
days ago and had to come back just to say that, it's just like what you said.
There is enough variety of projects in here, big and small, intricate and
simple. Cheers!